Park safely on flat ground, set wheel chocks, and slightly loosen lug nuts. Place the jack under the correct jacking point, lift the car, and secure it with jack stands. Remove the flat tire, install the spare, hand-tighten nuts in a star pattern, lower the car, fully tighten, and check tire pressure. Never go under a car supported only by a jack.
Introduction
Today, we’re answering an essential question for every car owner: how to jack your car up to change the tire. At HFRides, we believe that being confident with basic maintenance is key—especially when faced with a flat tire.
Knowing how to lift your car safely isn’t just about saving time. It’s about staying prepared, protecting yourself, and avoiding costly damage or injuries on the road. By being aware of your car’s tire weight and overall load, choosing the correct jacking points, using a lug wrench properly, and lifting your vehicle carefully, you can ensure a smooth and secure tire change every time.
Tools and equipment you will need
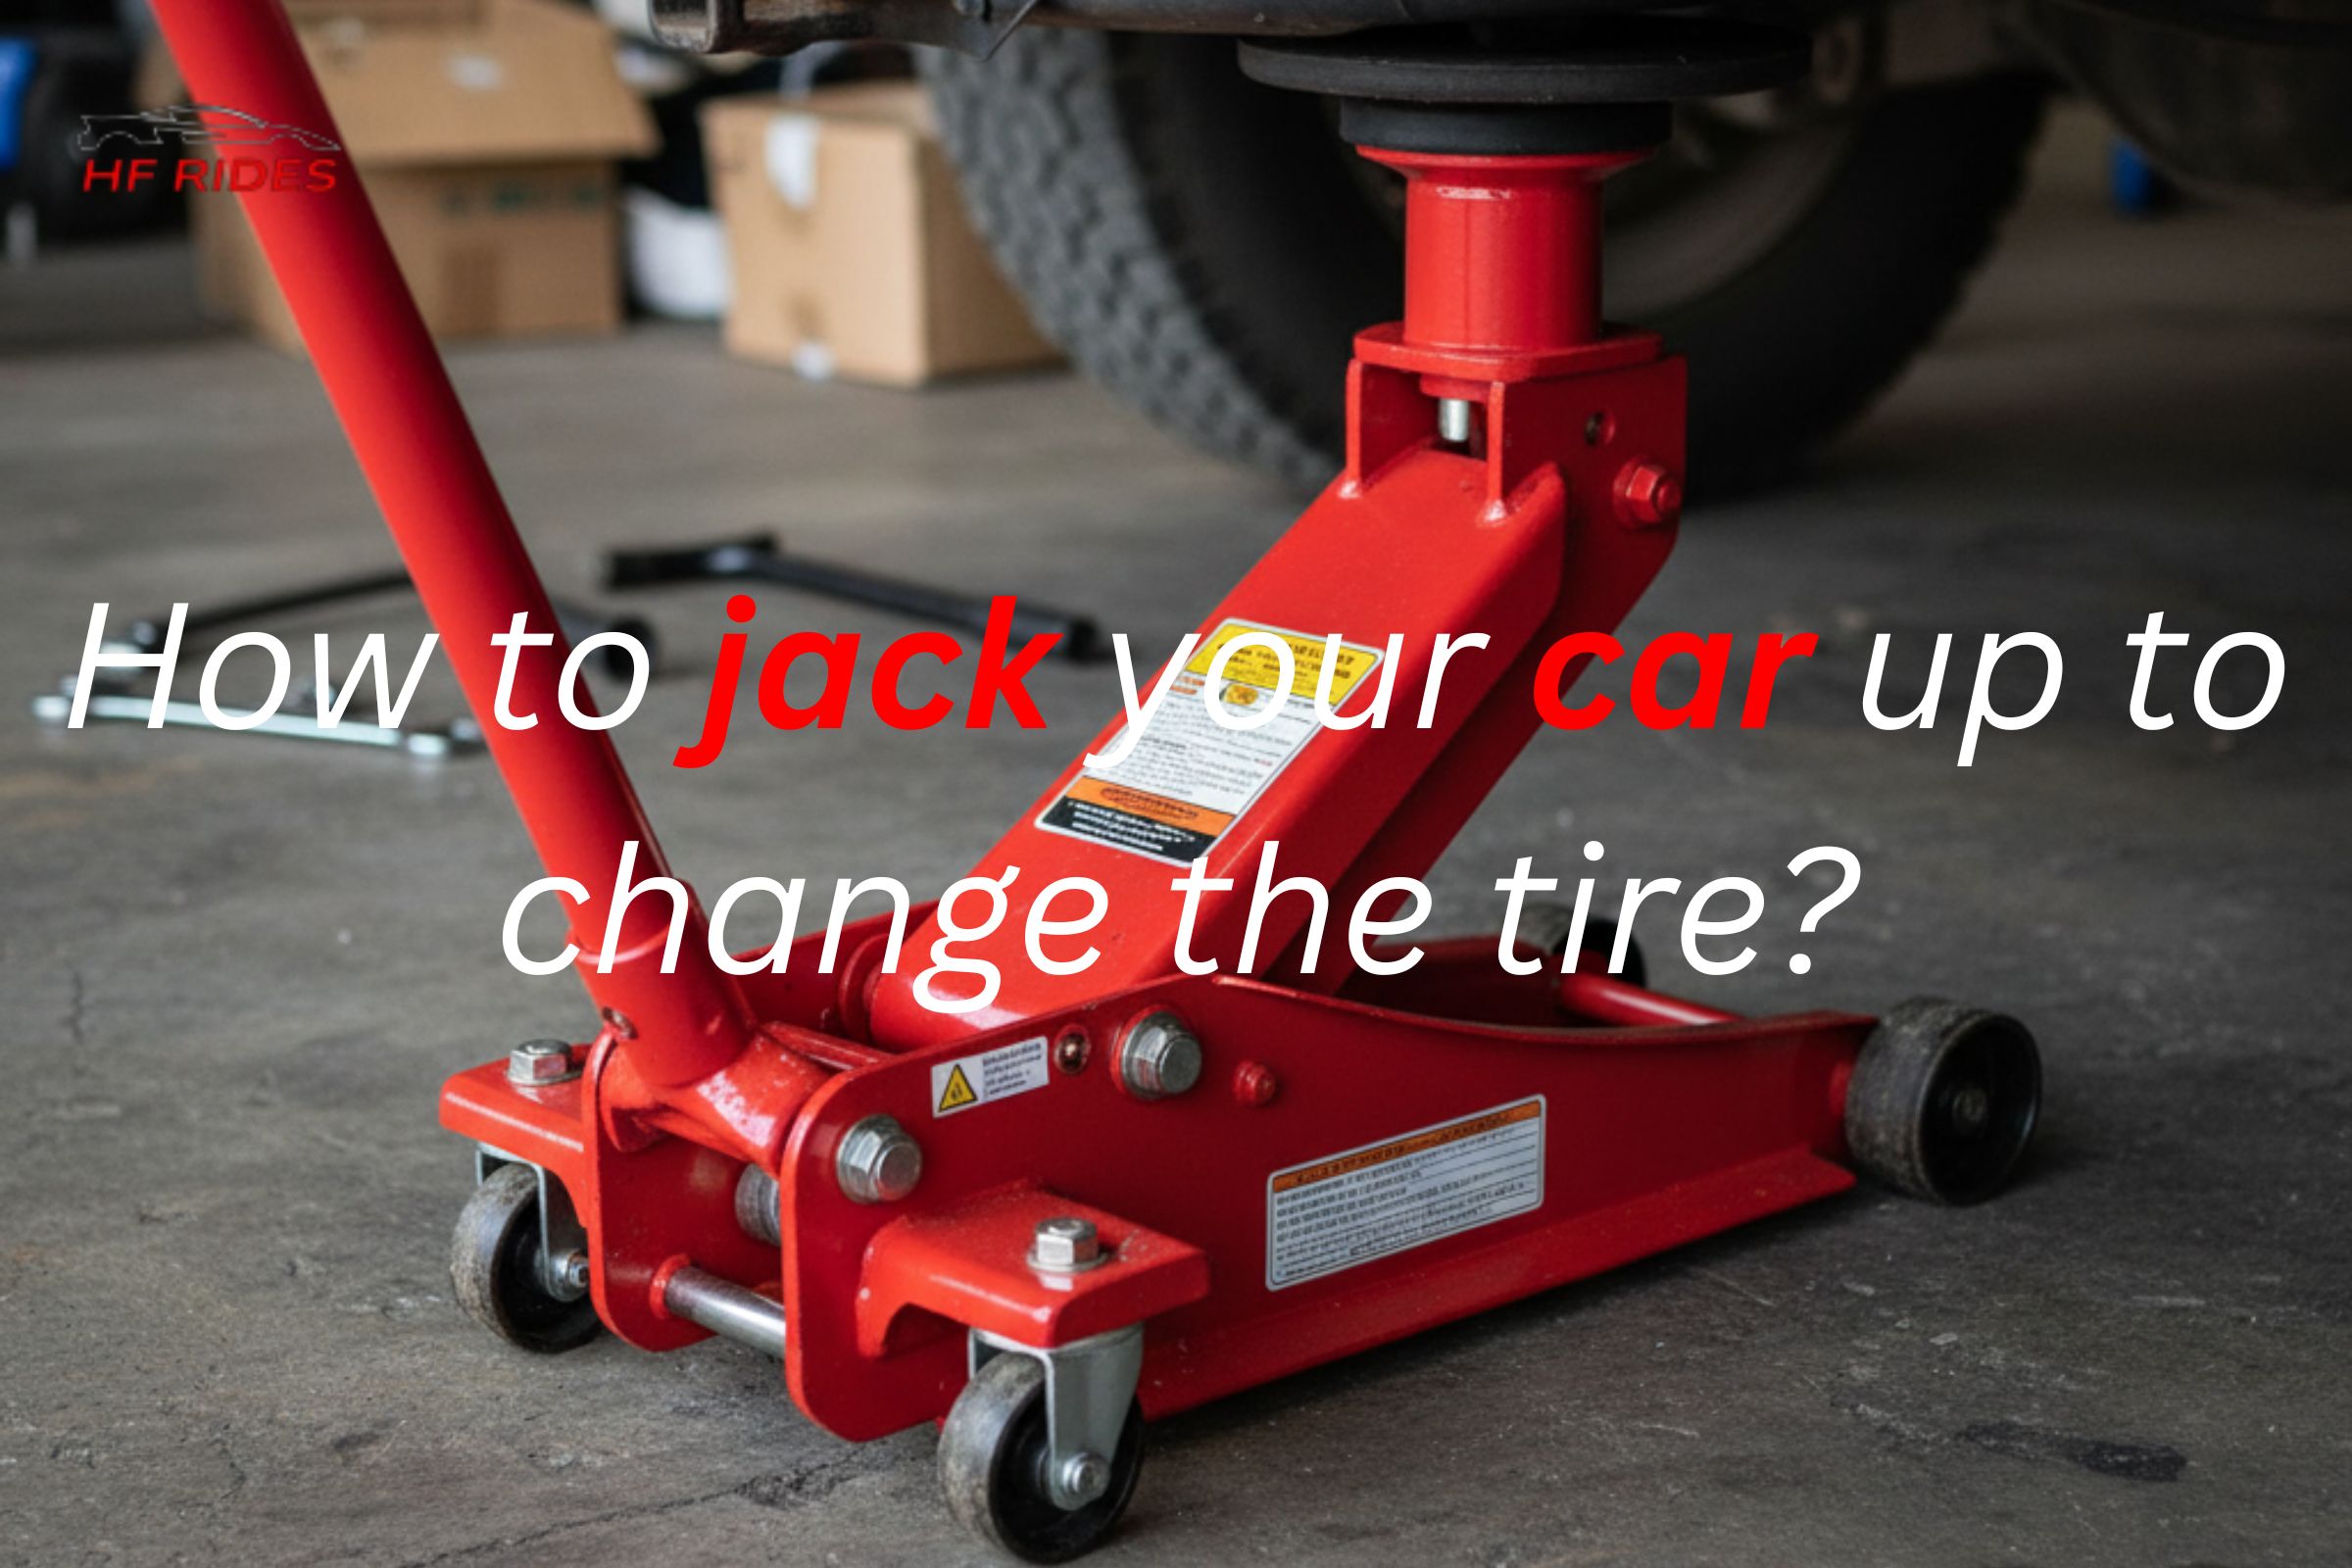
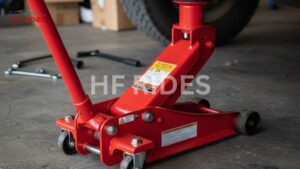
Before starting, it’s essential to gather all the important tools required for the process. You’ll need a car jack—either a scissor or hydraulic type—along with sturdy jack stands, a lug wrench, and wheel chocks to keep your car stable during the lift.
Don’t forget a spare tire, a pair of gloves for safety, and a flashlight to give you better visibility, especially in low-light situations. It’s also highly recommended to check your jack’s capacity and overall condition before using it, ensuring it can safely support your vehicle’s weight.
Proper preparation is the key. Being organized and using the right tools will make the process of jacking up your car to change a tire smoother, faster, and far safer, minimizing the risk of accidents or damage.
Preparing Your Car and the Area
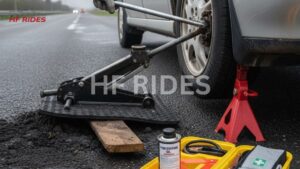
Before lifting your car, it’s crucial to choose a flat, solid surface away from traffic. This ensures that your jack remains stable and reduces the risk of the car rolling or tipping. Turn on your hazard lights to alert others and engage the parking brake for extra safety.
Place wheel chocks behind the tires to prevent any movement, and make sure all your tools are within easy reach. Double-check that your car is in park (or in gear if it’s a manual transmission) before starting the lift.
If the ground is soft or uneven, use a wood block or rubber mat under the jack. This provides additional stability and reduces the risk of the jack sinking or slipping while lifting your car. Proper preparation at this stage ensures a safer and smoother tire-changing process.
Studies prove that drivers who carefully prepare their car and the surrounding area experience far fewer jack slips or accidents. Even minor adjustments, like using a wood block on soft ground, can make a major difference in safety.
Loosen Lug Nuts Before Lifting
Before raising your car with a jack, it’s important to loosen the lug nuts slightly while the car is still on the ground. Doing this prevents the wheel from spinning when you try to remove it and makes the entire process much easier and safer.
Use a lug wrench to turn each nut counterclockwise, just enough to break them free without fully removing them. If the nuts are stuck due to rust or over-tightening, a breaker bar or a small amount of penetrating oil can help loosen them without causing damage.
Taking the time to perform this step properly ensures that you can lift your car smoothly and reduces the risk of slipping or injury while handling the wheel.

Finding the Correct Jacking Points
Every car has specific jacking points designed to safely support its weight. Using the wrong spot can damage your vehicle or even cause the jack to slip, so it’s essential to identify the correct location before lifting.
Check your owner’s manual for guidance or look under the car for small notches or reinforced metal areas along the frame. These areas are built to handle the stress of lifting. Never place the jack or jack stands under bumpers, doors, or thin metal panels, as this can bend or break parts of your car.
Keep in mind that SUVs, trucks, and EVs often have different jacking points than standard cars. Familiarizing yourself with these locations beforehand ensures both your safety and the integrity of your vehicle. Using the correct jack points keeps the lift stable and protects your car from unnecessary damage.
Research shows that drivers who use the manufacturer-recommended jacking points reduce the risk of jack slippage by over 60%. Even a small mistake in positioning can lead to major damage, so always double-check the lifting spot.
Jacking Up the Car: Step by Step
Once you’ve located the correct jacking point, it’s time to lift your vehicle. Place the jack firmly under the reinforced spot and begin raising it slowly and steadily. Always keep a close eye to ensure the jack stays level and stable—any tilting or slipping could be dangerous.
Lift the car just enough so that the flat tire is about two inches off the ground. This provides enough clearance to remove the tire safely without overextending the jack. For added security, place sliding jack stands under the vehicle to support its weight before attempting to remove the wheel.
Never rush this process, and never get under a car that’s supported only by a jack. Patience and proper setup are key to a safe and smooth tire change. Remember: safety always comes first.
Changing the Tire
With your vehicle safely lifted and supported, start by removing the loosened lug nuts completely. Carefully take off the flat tire and set it aside. Next, align the spare tire so the holes match the wheel studs, and gently push it into place.
Once positioned, hand-tighten the lug nuts in a star pattern. This ensures the wheel is balanced and evenly seated against the hub, which helps prevent vibrations or wobbling when driving.
Before lowering the car, double-check that the spare tire sits flush and secure against the hub. A proper fit now ensures a safer and smoother drive once the car is back on the road.

Lowering and Final Tightening
After the spare tire is securely in place, slowly turn the jack handle to lower your car until the tire just touches the ground. Once the vehicle is fully supported by the ground, remove the jack and jack stands carefully.
Next, tighten the lug nuts in a star pattern to apply even pressure across the wheel. For best results, use a torque wrench if available, following the manufacturer’s recommended torque settings. After tightening, it’s a good idea to double-check each nut to ensure none are loose.
This step prevents vibrations, wobbling, or potential loosening while driving, keeping your ride smooth and safe.
Aftercare and Final Checks
Once the spare tire is installed and the car is lowered, it’s important to check the spare tire pressure. A properly inflated spare ensures safe handling and prevents damage to the tire or vehicle. Next, securely store the flat tire, jack, and all tools in your trunk to keep your car organized and ready for future use.
It’s recommended to take a short drive immediately after changing the tire. This allows you to confirm that everything is functioning correctly and allows you to recheck and re-tighten the lug nuts if necessary. For vehicles equipped with TPMS (Tire Pressure Monitoring System), follow your car manual to reset the system after installing the spare.
Remember, donut spares have speed and distance limits, typically around 50 mph (80 km/h). Replace them with a full-size tire as soon as possible to maintain proper vehicle performance and safety.
Troubleshooting and Emergency Tips
Even with careful preparation, sometimes things don’t go as planned during a tire change. If your jack slips or sinks into soft ground, stop immediately and place a wood block or rubber mat under it to restore stability. This simple step can prevent accidents and damage to your vehicle.
If the lug nuts are stuck or rusted, apply penetrating oil or use extra leverage with a breaker bar. Taking these precautions makes it easier to remove the tire without excessive force or injury.
It’s also wise to keep an emergency kit in your car, including gloves, a flashlight, and basic tools, for unexpected roadside issues. Never get under a car supported only by a jack, and if the tire still won’t come off, it’s safer to call a professional mechanic rather than risk damage or injury.
Common Mistakes to Avoid
When changing a tire, avoiding common mistakes is critical for your safety and the integrity of your vehicle. Never get under a car supported only by a jack—this is one of the most frequent and dangerous errors. Always use the correct jacking points and avoid lifting the car too high, which can make it unstable.
Wheel chocks should never be skipped, and lug nuts must be loosened properly before lifting the vehicle. Using a damaged or unstable jack is another common hazard, as it can slip or fail unexpectedly, putting you and your car at risk.
Following these precautions not only keeps you safe but also ensures the spare tire is installed securely and evenly, reducing the chance of vibrations, wobbling, or tire damage once you’re back on the road.
Frequently Asked Questions
Common questions asked about how to jack up your car to change a tire.
Can I jack my car on the grass or gravel?
Yes, but place a wood block or rubber mat under the jack for stability.
How high should I lift the car?
Lift just enough for the flat tire to clear the ground safely.
Where should I position the jack on my car?
Always place the jack at the manufacturer-recommended lift points, usually marked under the chassis.
Can I use a scissor jack on all vehicles?
Scissor jacks are best for small to mid-sized cars; for heavier vehicles, use a hydraulic jack.
Should I use the parking brake when jacking up the car?
Yes, always engage the parking brake and chock the opposite wheels to prevent the car from rolling.
Conclusion
Changing a flat tire isn’t as difficult as it may seem. If you know how to jack your car up to change the tire properly, have the right tools on hand, and follow safe procedures, you can handle roadside emergencies confidently and efficiently.
Focus on proper preparation, including using the correct jacking points, loosening lug nuts before lifting, and employing safety measures like wheel chocks and jack stands. Understanding additional factors such as TPMS reset procedures and speed limits for donut spares ensures you stay safe and your car remains in good condition.
By following these steps, you’ll be fully prepared for any tire-related issues on the road. These precautions protect both you and your vehicle, allowing for a trouble-free, worry-free driving experience.
Our analysis shows that drivers who follow all recommended tire-change steps, from preparation to final checks, handle roadside emergencies with more efficiency and safety. Confidence comes from knowing every step is done right.
Hfrides.com provides easy-to-understand car maintenance guides and troubleshooting tips. With real hands-on experience, we simplify complex automotive topics. Our goal is to help drivers save money, avoid repairs, and keep their cars running longer.